| You'll also need: Plaster, cement, sand,
rocks, pipe, lead weights, etc. (kids sand box, road, drive way, junk yard, back yard,
stolen ) anything you can think of to add weight to the legs of the base "U"
section. I cut three pieces 20" long and then
cut one of the pieces in half. then I cemented the 2 elbows to separate 20" pieces.
Then I cemented two 10" pieces to the other end of the elbow. Now, place BUT DO NOT
CEMENT the "T" in place.
Place the assembly on the floor and insert the 36"
piece into the "T." Get everything flat on the floor and rotate the
"T" so the upper end of the 36" piece is over the middle of the
"U" formed by the base.
Mark with a Sharpie marker the location of the
"T" on the two 10" pieces of pipe. Then cement the "T" in place.
This is kinda tricky cause the cement sits up really fast so try to keep the base flat on
the same plane.
Glue the half coupling on the middle of the poster frame
with the GOOP cement and allow it to dry overnight.
I used expanding insulation foam from LOWES to plug up the
tubing on either side of the "T." After it had set up I filled the legs
with sand and capped them.
These stands are very wind resistant and easy to break down
and store. Click on the thumbnails to see a bigger image.
 |
 |
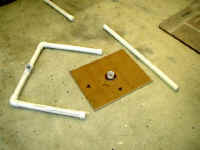
Here's the stand broken down
into its three parts: the U, the
poster and the upright.. |
GOOP is used to cement the
half-coupling to the back of the
poster. Let it dry over night. |
 |
 |
With the 36" inch piece
in the
"T," all that's left to be done is
put the poster in place |
Ready for an air show. If you
want to make them even more
wind resistant, make the 36"
piece shorter. |
|